
Signing up for Amazon Web Services
To sign up to Amazon Web Services just click here. You will need a credit card to sign up and it’s also advisable to read about [Amazon Free Tier Limits] (http://docs.aws.amazon.com/awsaccountbilling/latest/aboutv2/free-tier-limits.html) so that you dont incur any unexpected charges. With a new account you can run a t2.micro or t1.micro Linux and Microsoft server for one year.
AMIs that are eligible for the free tier are marked in the Amazon EC2 Launch Wizard as Free tier eligible. The free tier allotment for Linux and Microsoft Windows instances is counted separately; you can run 750 hours of a Linux t2.micro or t1.micro instance plus 750 hours of a Windows t2.micro or t1.micro instance each month for the first 12 months.
When you first sign up you’ll be using your root account. This account has access to all services and features in AWS. For security best pratice it is highly advisable to create an IAM user with restricted access to only the services required. Further reading about IAM best practices is here.
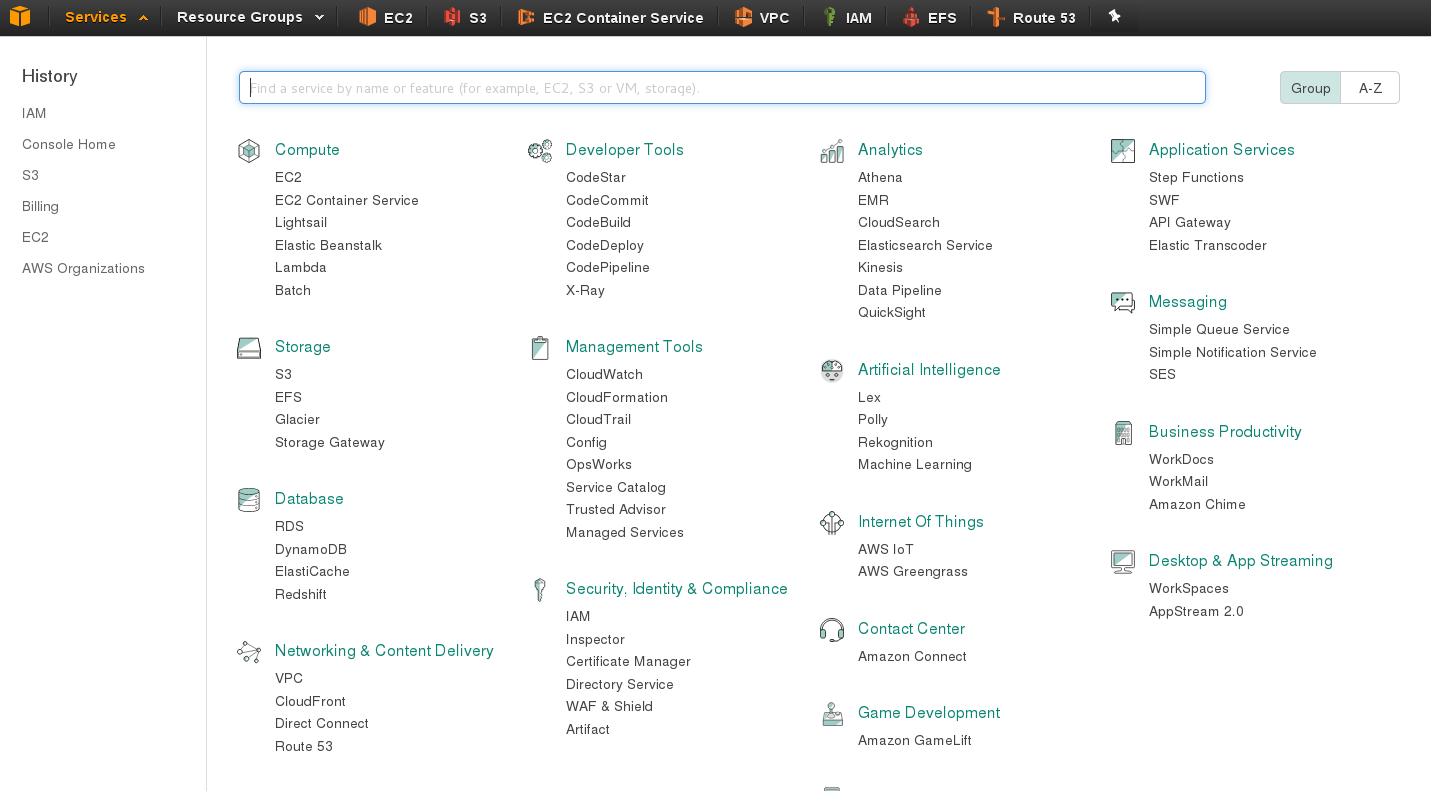
Once logged in to AWS you should select Services in the top left corner and select IAM.
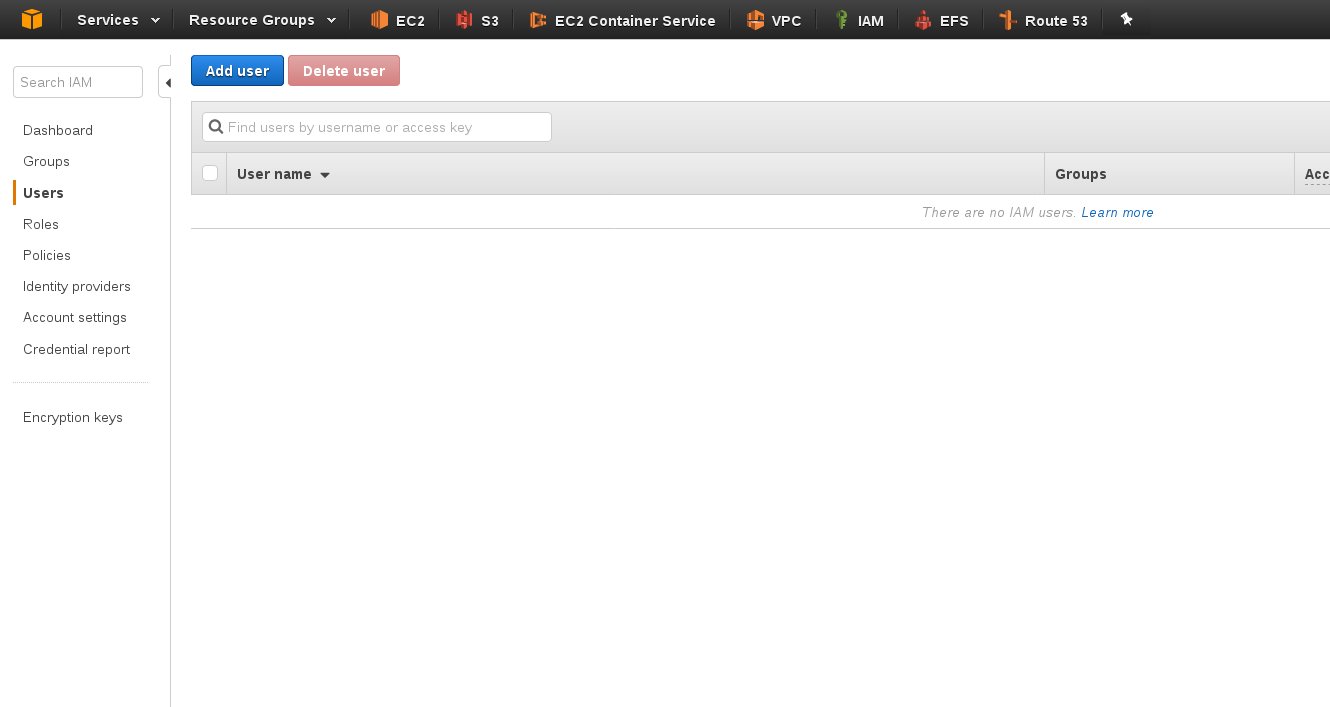
Once you have IAM open select Users from the left and then click Add user.
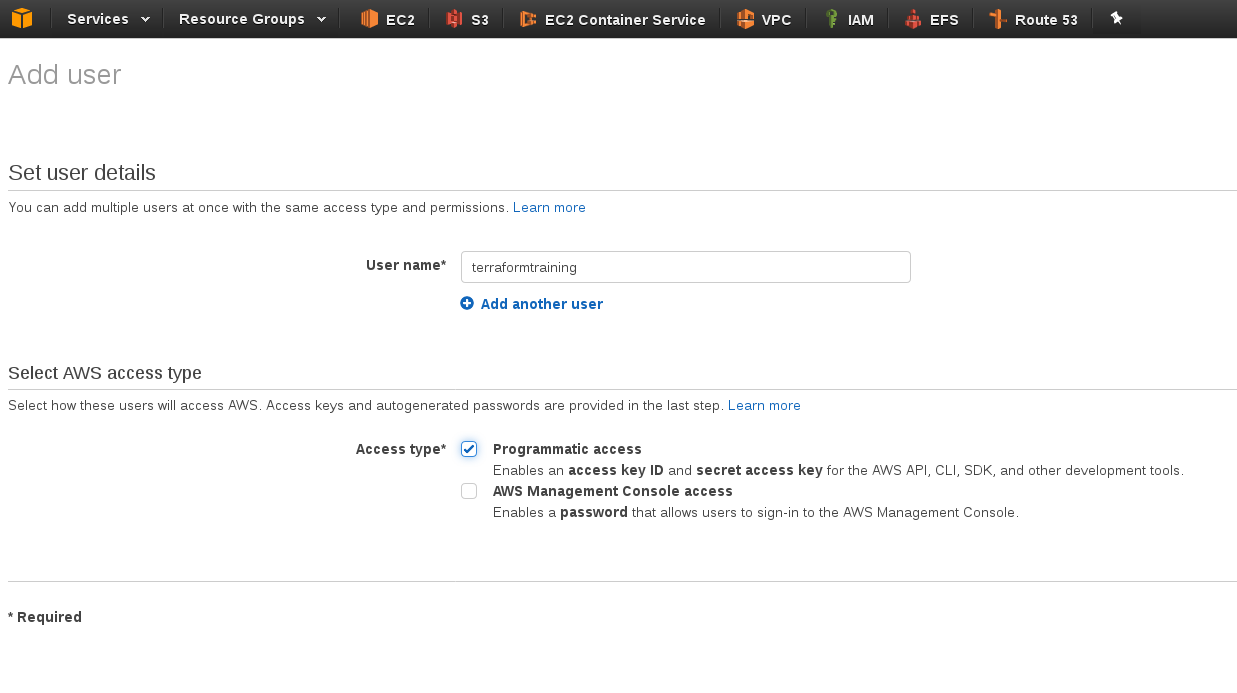
Enter a User name select Programmatic access and then click next.
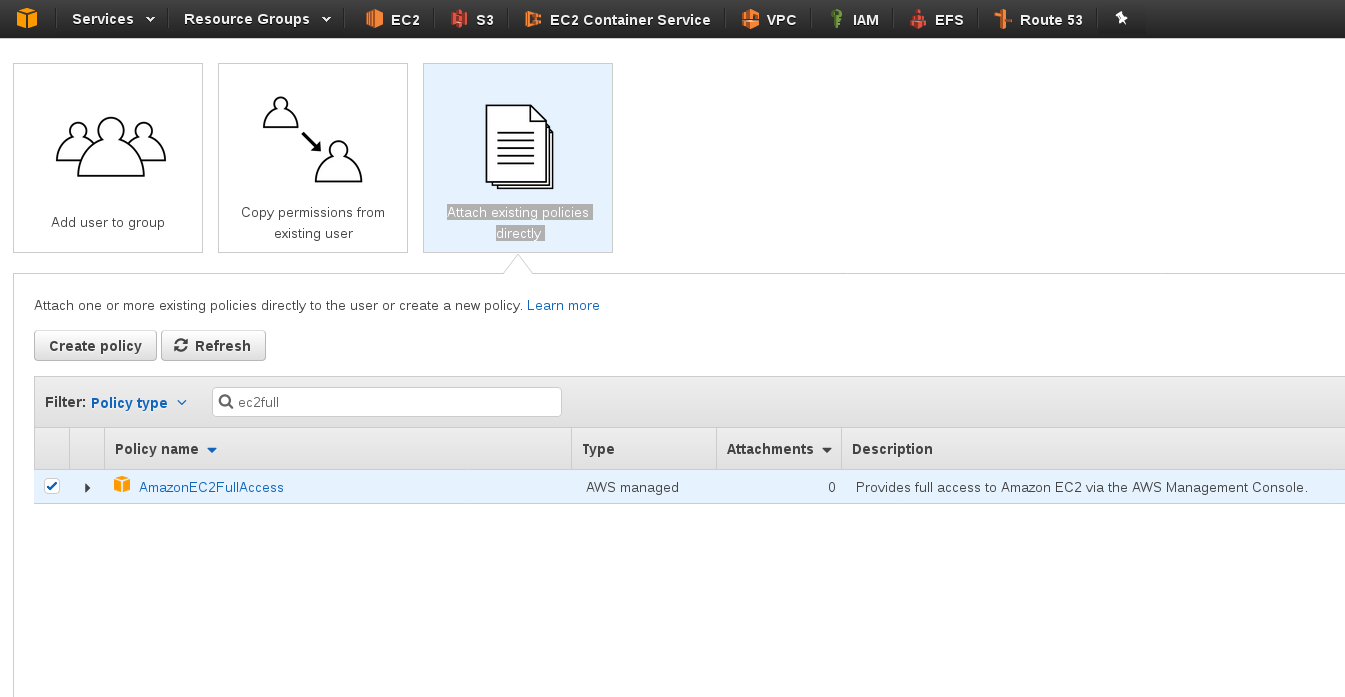
Click Attach existing policies directly and search for ec2full put a tick in the box and click next twice.
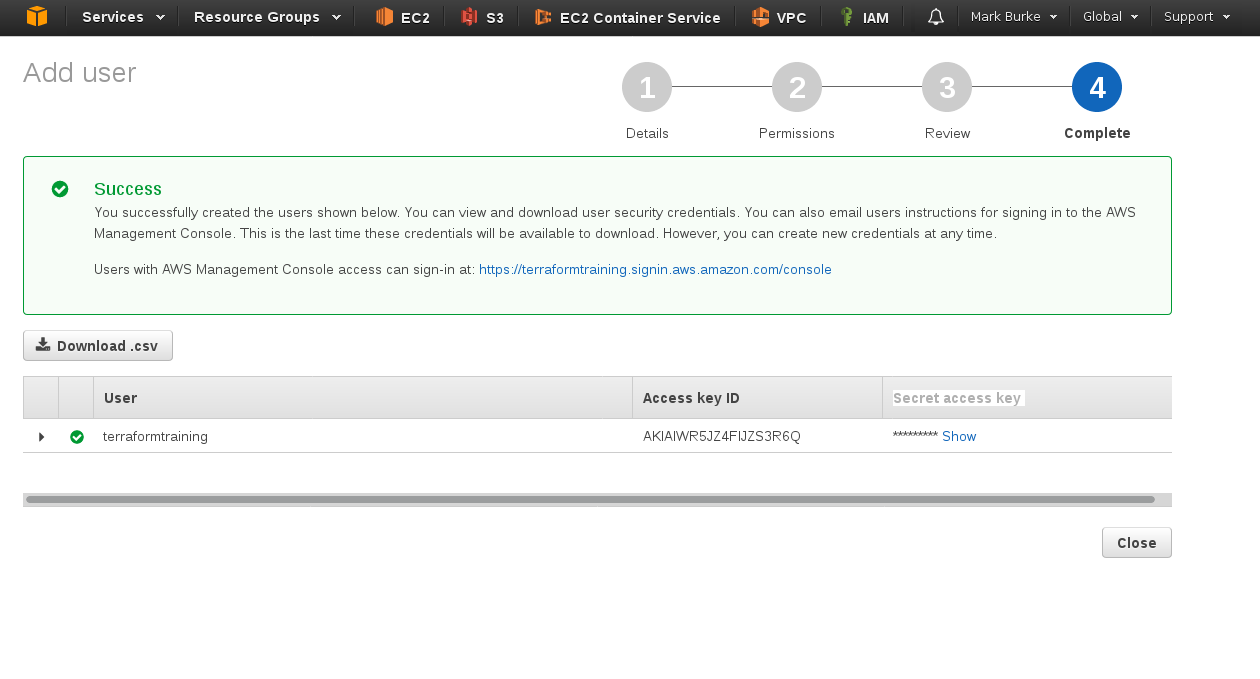
On the next page you should be able to view your Access key ID and Secret access key. Click Download .csv to download to your computer.
Time to deploy a real server
Terraform uses files with the extention .tf and these are the file types we use to describe our infrastructure. From now on I will be working within my /home/markb/dev folder as below. Terraform is installed and ready to go.
[markb@feddy demo.1] $ pwd
/home/markb/dev/demo.1
[markb@feddy demo.1] $ terraform
Usage: terraform [--version] [--help] <command> [args]

The available commands for execution are listed below.
The most common, useful commands are shown first, followed by
less common or more advanced commands. If you're just getting
started with Terraform, stick with the common commands. For the
other commands, please read the help and docs before usage.

Common commands:
    apply              Builds or changes infrastructure
    console            Interactive console for Terraform interpolations
    destroy            Destroy Terraform-managed infrastructure
    env                Environment management
    fmt                Rewrites config files to canonical format
    get                Download and install modules for the configuration
    graph              Create a visual graph of Terraform resources
    import             Import existing infrastructure into Terraform
    init               Initialize a new or existing Terraform configuration
    output             Read an output from a state file
    plan               Generate and show an execution plan
    push               Upload this Terraform module to Atlas to run
    refresh            Update local state file against real resources
    show               Inspect Terraform state or plan
    taint              Manually mark a resource for recreation
    untaint            Manually unmark a resource as tainted
    validate           Validates the Terraform files
    version            Prints the Terraform version

All other commands:
    debug              Debug output management (experimental)
    force-unlock       Manually unlock the terraform state
    state              Advanced state management
[markb@feddy demo.1] $
Configuring our first .tf file
Below is a basic configuration to deploy a CentOS7 server to AWS in the Oregon us-west-2 region. You can get a list of the CentOS AMI IDs from here. Just copy the code below, change the access and secret key to the ones you downloaded earlier and save the file as aws.tf.
provider "aws" {
  access_key = "ENTER-YOUR-ACCESS-KEY-HERE"
  secret_key = "ENTER-YOUR-SECRET-KEY-HERE"
  region     = "us-west-2"
}

resource "aws_instance" "web-server" {
  ami           = "ami-0c2aba6c"
  instance_type = "t2.micro"

  tags {
    Name = "terraformtraining.com"
  }
}
Once you’ve saved the file its time to run Terraform. Terraform has a command terraform plan which won’t make any actual changes to any of your infrastructure. It simply prints out what it intends to do when you run terraform apply. So lets run now terraform plan.
[markb@feddy demo.1] $ terraform plan
Refreshing Terraform state in-memory prior to plan...
The refreshed state will be used to calculate this plan, but will not be
persisted to local or remote state storage.

The Terraform execution plan has been generated and is shown below.
Resources are shown in alphabetical order for quick scanning. Green resources
will be created (or destroyed and then created if an existing resource
exists), yellow resources are being changed in-place, and red resources
will be destroyed. Cyan entries are data sources to be read.

Note: You didn't specify an "-out" parameter to save this plan, so when
"apply" is called, Terraform can't guarantee this is what will execute.

+ aws_instance.web-server
    ami:                          "ami-0c2aba6c"
    associate_public_ip_address:  "<computed>"
    availability_zone:            "<computed>"
    ebs_block_device.#:           "<computed>"
    ephemeral_block_device.#:     "<computed>"
    instance_state:               "<computed>"
    instance_type:                "t2.micro"
    ipv6_address_count:           "<computed>"
    ipv6_addresses.#:             "<computed>"
    key_name:                     "<computed>"
    network_interface.#:          "<computed>"
    network_interface_id:         "<computed>"
    placement_group:              "<computed>"
    primary_network_interface_id: "<computed>"
    private_dns:                  "<computed>"
    private_ip:                   "<computed>"
    public_dns:                   "<computed>"
    public_ip:                    "<computed>"
    root_block_device.#:          "<computed>"
    security_groups.#:            "<computed>"
    source_dest_check:            "true"
    subnet_id:                    "<computed>"
    tags.%:                       "1"
    tags.Name:                    "terraformtraining.com"
    tenancy:                      "<computed>"
    volume_tags.%:                "<computed>"
    vpc_security_group_ids.#:     "<computed>"


Plan: 1 to add, 0 to change, 0 to destroy.
So above we can see that we are going to deploy one server using AMI ami-0c2aba6c with the tag terraformtraining.com. Now lets hit terraform apply and create the server.
[markb@feddy demo.1] $ terraform apply
aws_instance.web-server: Creating...
ami: "" => "ami-0c2aba6c"
associate_public_ip_address: "" => "<computed>"
availability_zone: "" => "<computed>"
ebs_block_device.#: "" => "<computed>"
ephemeral_block_device.#: "" => "<computed>"
instance_state: "" => "<computed>"
instance_type: "" => "t2.micro"
ipv6_address_count: "" => "<computed>"
ipv6_addresses.#: "" => "<computed>"
key_name: "" => "<computed>"
network_interface.#: "" => "<computed>"
network_interface_id: "" => "<computed>"
placement_group: "" => "<computed>"
primary_network_interface_id: "" => "<computed>"
private_dns: "" => "<computed>"
private_ip: "" => "<computed>"
public_dns: "" => "<computed>"
public_ip: "" => "<computed>"
root_block_device.#: "" => "<computed>"
security_groups.#: "" => "<computed>"
source_dest_check: "" => "true"
subnet_id: "" => "<computed>"
tags.%: "" => "1"
tags.Name: "" => "terraformtraining.com"
tenancy: "" => "<computed>"
volume_tags.%: "" => "<computed>"
vpc_security_group_ids.#: "" => "<computed>"
aws_instance.web-server: Still creating... (10s elapsed)
aws_instance.web-server: Still creating... (20s elapsed)
aws_instance.web-server: Still creating... (30s elapsed)
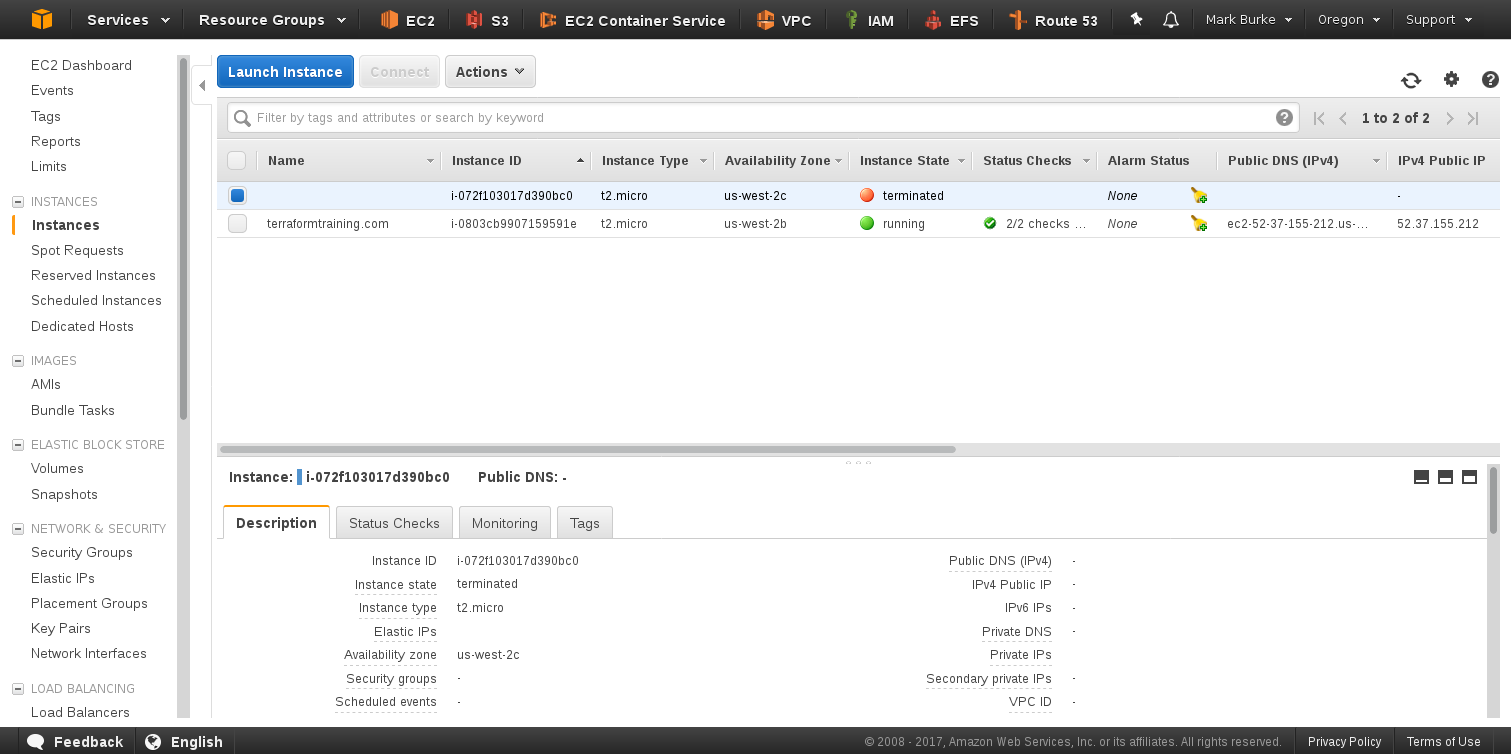
aws_instance.web-server: Creation complete (ID: i-0803cb9907159591e)
Apply complete! Resources: 1 added, 0 changed, 0 destroyed.
And there we have it, one server deployed. Lets go across to the AWS console to check the state of our new server. Yes there it is!
Now to destroy the server we simply run the command terraform destroy and then type yes to confirm our actions.
[markb@feddy demo.1] $ terraform destroy
Do you really want to destroy?
Terraform will delete all your managed infrastructure.
There is no undo. Only 'yes' will be accepted to confirm.
Enter a value: yes
aws_instance.web-server: Refreshing state... (ID: i-0803cb9907159591e)
aws_instance.web-server: Destroying... (ID: i-0803cb9907159591e)
aws_instance.web-server: Still destroying... (ID: i-0803cb9907159591e, 10s elapsed)
aws_instance.web-server: Still destroying... (ID: i-0803cb9907159591e, 20s elapsed)
aws_instance.web-server: Still destroying... (ID: i-0803cb9907159591e, 30s elapsed)
aws_instance.web-server: Still destroying... (ID: i-0803cb9907159591e, 40s elapsed)
aws_instance.web-server: Still destroying... (ID: i-0803cb9907159591e, 50s elapsed)
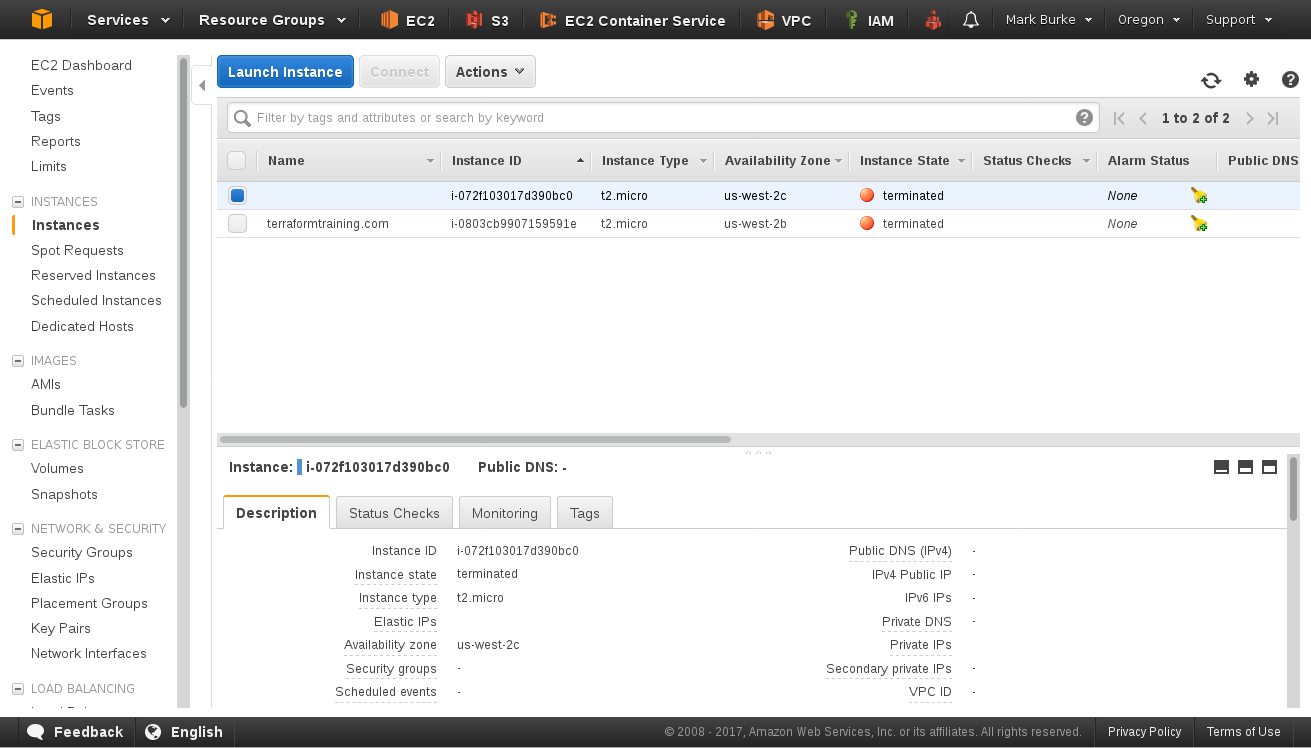
aws_instance.web-server: Destruction complete
Destroy complete! Resources: 1 destroyed.
Now lets go back over to our console to check the state of the machine. Yes, it’s now been terminated.
In my next post I’ll show you a few methods so you don’t have to have your credentials stored in .tf files and so avoid committing them to git/source control.