In this post i’m going to show you how to mount a volume larger than 2TB to a Linux EC2 instance.
Make sure you back up your data before proceeding!
Using the standard MBR Partitioning scheme we are limited to a block size of 2TB, docs here..
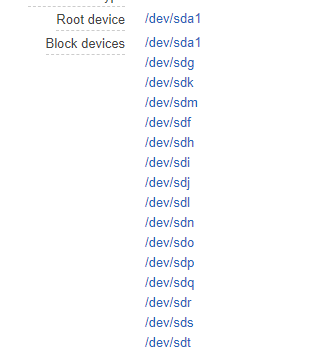
This means as time goes on you can end up in a situation where you have something like this..Arrghh! Not pretty, and a total pain to restore from snapshots.
So how do we fix this? Well just follow the instructions below.
Let’s have a look at what we currenly have attached our Lunux instance.
One root volume with 100GB of free space.
[root@ip-172-31-37-64 ~]# lsblk
NAME        MAJ:MIN RM  SIZE RO TYPE MOUNTPOINT
nvme0n1     259:0    0  100G  0 disk
`-nvme0n1p1 259:2    0  100G  0 part /
So now let’s create a new volume of say 5TB, attach to the instance and run lsblk again.
[root@ip-172-31-37-64 ~]# lsblk
NAME        MAJ:MIN RM  SIZE RO TYPE MOUNTPOINT
nvme0n1     259:0    0  100G  0 disk
`-nvme0n1p1 259:2    0  100G  0 part /
nvme2n1     259:4    0  4.9T  0 disk
As you can now see we have a new disk nvme2n1 with a size of 4.9TB. Now let’s use parted to format the disk. note how I use mklabel gpt.
[root@ip-172-31-37-64 ~]# parted /dev/nvme2n1
GNU Parted 3.1
Using /dev/nvme2n1
Welcome to GNU Parted! Type 'help' to view a list of commands.
(parted) mklabel gpt
(parted) unit TB
(parted) mkpart primary 0.00TB 4.90TB
(parted) print
Model: NVMe Device (nvme)
Disk /dev/nvme2n1: 5.37TB
Sector size (logical/physical): 512B/512B
Partition Table: gpt
Disk Flags:

Number  Start   End     Size    File system  Name     Flags
 1      0.00TB  5.37TB  5.37TB               primary

(parted) quit
Information: You may need to update /etc/fstab.
Now we can run lsblk again to see what we have.
[root@ip-172-31-37-64 ~]# lsblk
NAME        MAJ:MIN RM  SIZE RO TYPE MOUNTPOINT
nvme0n1     259:0    0  100G  0 disk
`-nvme0n1p1 259:2    0  100G  0 part /
nvme2n1     259:4    0  4.9T  0 disk
`-nvme2n1p1 259:5    0  4.9T  0 part
As you can see from the last line above we now have a new 4.9TB partition called nvme2n1p1, the next step is to make our file system, I’m going to use ext4.
[root@ip-172-31-37-64 ~]# mkfs.ext4 /dev/nvme2n1p1
mke2fs 1.42.9 (28-Dec-2013)
Filesystem label=
OS type: Linux
Block size=4096 (log=2)
Fragment size=4096 (log=2)
Stride=0 blocks, Stripe width=0 blocks
163840000 inodes, 1310719488 blocks
65535974 blocks (5.00%) reserved for the super user
First data block=0
Maximum filesystem blocks=3458203648
40000 block groups
32768 blocks per group, 32768 fragments per group
4096 inodes per group
Superblock backups stored on blocks:
        32768, 98304, 163840, 229376, 294912, 819200, 884736, 1605632, 2654208,
        4096000, 7962624, 11239424, 20480000, 23887872, 71663616, 78675968,
        102400000, 214990848, 512000000, 550731776, 644972544

Allocating group tables: done
Writing inode tables: done
Creating journal (32768 blocks): done
Writing superblocks and filesystem accounting information: done
Now that is done we can mount the disk and add to /etc/fstab for automount. So let’s get the UUID of the disk by using blkid.
[root@ip-172-31-37-64 ~]# blkid
/dev/nvme1n1: PTTYPE="gpt"
/dev/nvme1n1p1: UUID="433f72d9-2576-466a-91a9-711d7a7dfd8f" TYPE="ext4" PARTLABEL="primary" PARTUUID="609d0c18-88cb-406a-bb9c-d4dd8528a467"
First we create a folder
mkdir /data
And then we edit /etc/fstab with the UUID above.
UUID=433f72d9-2576-466a-91a9-711d7a7dfd8f /data ext4 defaults,nofail 0 2
Mount the disk and we’re done.
mount -a
Now check the disk
[root@ip-172-31-37-64 ~]# df -h
Filesystem      Size  Used Avail Use% Mounted on
devtmpfs        1.8G     0  1.8G   0% /dev
tmpfs           1.8G     0  1.8G   0% /dev/shm
tmpfs           1.8G   17M  1.8G   1% /run
tmpfs           1.8G     0  1.8G   0% /sys/fs/cgroup
/dev/nvme0n1p1  100G  4.5G   96G   5% /
tmpfs           358M     0  358M   0% /run/user/1000
/dev/nvme1n1p1  4.9T   89M  4.6T   1% /data
That is one nice /data folder we have there, but what if we run out of space and need to expand it further still? Well let’s first put some data in /data to make sure we don’t suffer any data loss when expanding the volume.
Below I’m downloading a CentOS iso.
[root@ip-172-31-37-64 ~]# cd /data/
[root@ip-172-31-37-64 data]# curl -O http://mirror.as29550.net/mirror.centos.org/8-stream/isos/x86_64/CentOS-Stream-8-x86_64-20200801-boot.iso
  % Total    % Received % Xferd  Average Speed   Time    Time     Time  Current
                                 Dload  Upload   Total   Spent    Left  Speed
100  682M  100  682M    0     0  76.7M      0  0:00:08  0:00:08 --:--:-- 85.8M
[root@ip-172-31-37-64 data]# ll -h
-rw-r--r--. 1 root root 682M Aug 25 15:20 CentOS-Stream-8-x86_64-20200801-boot.iso
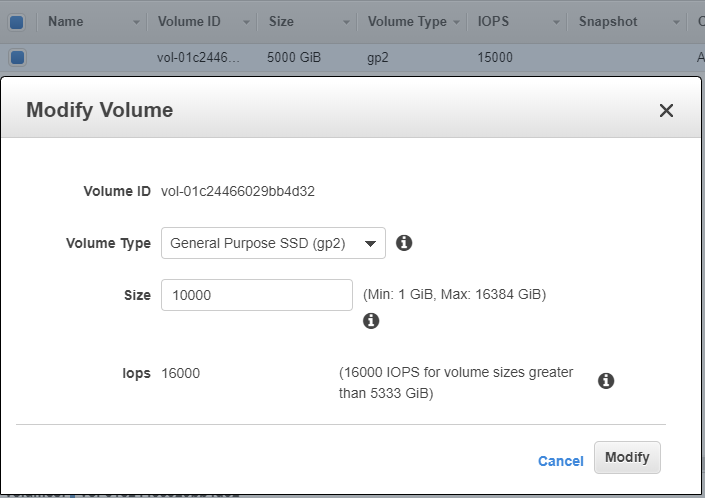
Now we can expand our disk in the AWS console. I’m going from 5000Gb to 10000GB.
You need to be patient here as optimizing the volume can take some time.
Once the volume optimizing is complete you must umount the volume.
umount /dev/nvme1n1p1 /data/
Now we can extend the existing partition with parted.
[root@ip-172-31-37-64 ~]#  parted /dev/nvme1n1
GNU Parted 3.1
Using /dev/nvme1n1
Welcome to GNU Parted! Type 'help' to view a list of commands.
(parted) print
Error: The backup GPT table is not at the end of the disk, as it should be.  This might mean that another operating system believes the disk is smaller.  Fix, by moving the     backup to the
end (and removing the old backup)?
Fix/Ignore/Cancel? fix
Warning: Not all of the space available to /dev/nvme1n1 appears to be used, you can fix the GPT to use all of the space (an extra 10485760000 blocks) or continue with the     current setting?
Fix/Ignore? fix
Model: NVMe Device (nvme)
Disk /dev/nvme1n1: 10.7TB
Sector size (logical/physical): 512B/512B
Partition Table: gpt
Disk Flags:

Number  Start   End     Size    File system  Name     Flags
 1      1049kB  5369GB  5369GB  ext4         primary

(parted)resizepart 1 100%
(parted) quit
Now mount the drive again
mount -a
and finally resize the partition
resize2fs /dev/nvme1n1p1
We now have a full usage of the extented volume
[root@ip-172-31-37-64 ~]# df -h
Filesystem      Size  Used Avail Use% Mounted on
devtmpfs        1.8G     0  1.8G   0% /dev
tmpfs           1.8G     0  1.8G   0% /dev/shm
tmpfs           1.8G   17M  1.8G   1% /run
tmpfs           1.8G     0  1.8G   0% /sys/fs/cgroup
/dev/nvme0n1p1  100G  4.5G   96G   5% /
tmpfs           358M     0  358M   0% /run/user/1000
/dev/nvme1n1p1  9.7T  720M  9.3T   1% /data
With the data still intact
[root@ip-172-31-37-64 ~]# ll /data/
total 698388
-rw-r--r--. 1 root root 715128832 Aug 25 15:20 CentOS-Stream-8-x86_64-20200801-boot.iso
drwx------. 2 root root     16384 Aug 25 15:07 lost+found


